Being a file, the process starts with annealing. This is simply heating the blade to orange (Which I'm not getting. I need a better heat treat setup) and allowing it to cool slowly. The slower it cools, the softer it will be. The best setup I've used for this is a good size fire with lots of coals, and simply letting the blade sit in the coals as they burn away to ash. Doing this, I've left a small fire to burn out, and come back the next day with the blade still too hot to touch under several layers of ash. The ash makes an excellent insulator.
Unfortunately, I don't have a place set up to do this kind of burn. I might just see about converting my small charcoal grill, or one bought in a pawn shop, and dedicate it for this purpose.

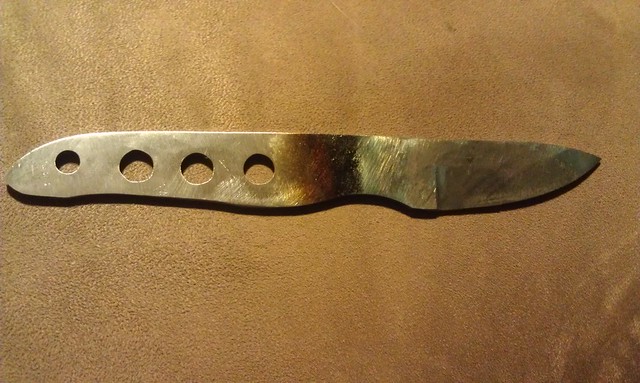
Not pictured here (my hands were filthy, and I didn't want to try and wash them to take a picture), after this point I used the disc sander and belt to grind the primary bevel, a basic V grind. I left a dime's thickness of material along the whole edge, and made sure that the grind was even on both sides, and proceeded to the heat treat step after I was satisfied with the grind lines.
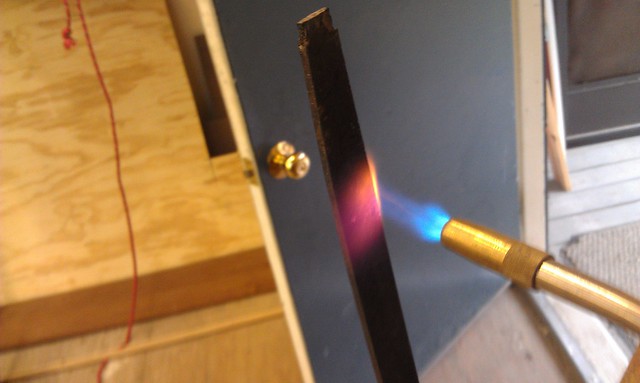
I heat treated by eye (I don't have the equipment to give the blade a good soak, so I brought the blade section up to dull red heat and tried to keep it there for about 5 minutes using my torch. Then I quenched in canola oil (I need to get some used motor oil and a big bucket). After the quench, I checked to see if I'd adequately hardened using a little Nicholson file I picked up for a quarter during the same pawn shop runs. The file didn't bite in deep, but it sure didn't skip off the edge either. After a minute or two, I decided to try to bring the blade back up to heat, and see if it would quench well in water.
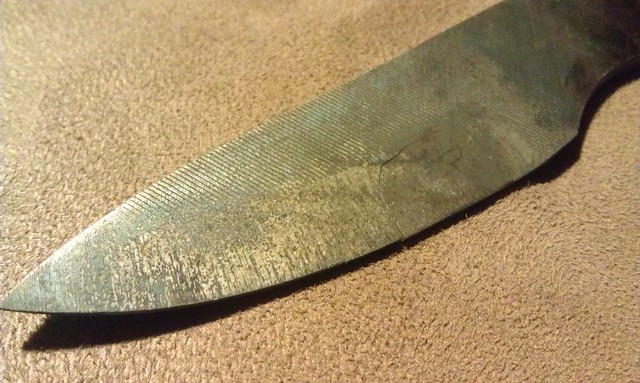
Big mistake... This closer view of the blade lets you see that I didn't grind off the file cuts on the flat, I thought they'd look nice. However, you should also notice that there's a pretty large crack running almost all the way from the edge to the blade flat.
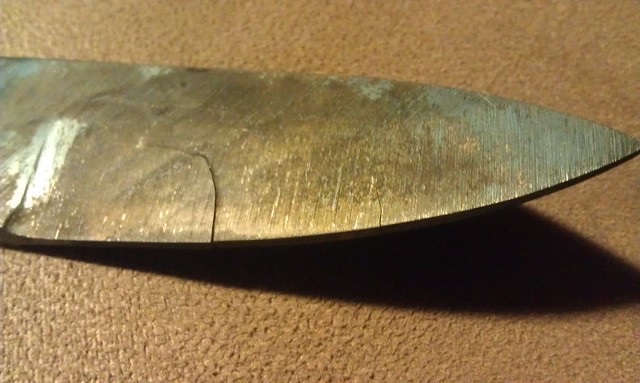
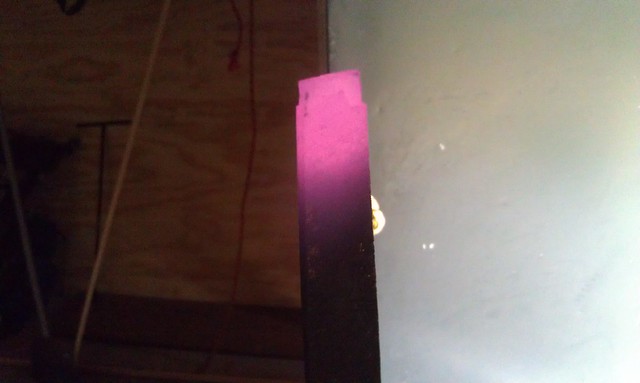
Here you can see the cracks a little better. Looking at the blade edge on, I could see serious warping. From the side (I couldn't get a picture), you can see light through the bigger crack. A smaller crack, only visible on this side, is about two thirds of the way up the blade.
So, this little knife is on its way to the dumpster. Either that, or I'll hang it over my water bucket with a "DON'T QUENCH HERE" sign.
Either way, it's back to the pawn shop to look for good blade material. Maybe I can find some lawnmower blades or more old rusted over mill files. But, before I get started on my next project, I think it'll do me some good to also try to pick up or build a decent setup for heat treatments. And to find a magnet on a stick.
No comments:
Post a Comment