I figured that I'd put up a couple of pictures of my knewest knives in progress.
As a side note, I just picked up Wayne Goddard's 50$ Knife Shop, which I will highly recommend to any knife hobbyists. It has great sections on design, but more importantly, on how to make do with improvised and scavenged tools, to let you get working on knives when you have a limited budget (way to go grad school!).
Anyways, I have three projects in the works right now. Two are meant for friends, and are designed (I hope) to fit their needs well. The last is for me, and I'll have to see if it works out (I'm not sure I made the handle long enough).
Itty bitty whittler is for me. This little puppy started life as a rusted out Nicholson file bought for 50c at a pawn shop.

It really is pretty tiny. My pinky hangs off the bottom, but holding it up high with my thumb along the back of the blade, it seems to fit extremely snug into my hand.
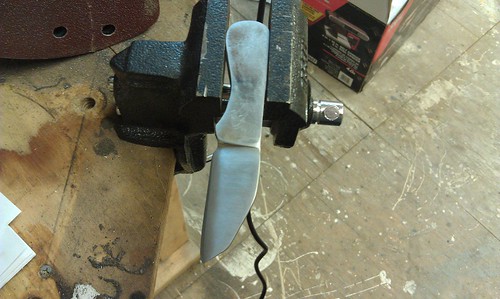
I set the little guy down in my vise to take a quick picture.
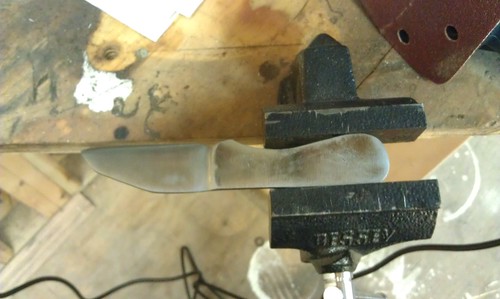
Another view in the vise. Right now, my shop is fairly rudimentary. I've got a small clamp on vise, some C-clamps, my filing jig and files (Possibly a post to come?), belt/disc sander (4 x 36"), and electric drill. Luckily, I have several other tools back in New Mexico just waiting for me to pick them up, including a grinding wheel, 10" wet wheel, 4" bench vise, another belt sander, anvil, and coal/charcoal forge.
Anyway, this little knife is meant for one thing, and one thing only: whittling. I kept the blade short and straight with a wharncliffe (sheepsfoot) profile, which I prefer over a blade with any curvature along the edge. Also, I'll be attempting to keep this puppy sharp using a combination of the scary sharp method (wet/dry paper on float glass), and convex edge maintenance using wet-dry paper and a mousepad or mud flap rubber. the blade has a convex zero edge on the right, and is flat on the left, leaving an overall convex chisel grind. I'm experimenting to see how I like this grind on a carving knife.
These pictures were taken after the final passes on my belt sander before starting a hand rubbed finish. Hardening was done using a mapp gas benzomatic style torch to heat to dull red, using room temperature vegetable oil to quench in (I know... very descriptive). Putting the primitive uncontrolled harden aside, the blade didn't warp or crack, and my files skipped right over the edge with no bite.
I tempered at 400F for two cycles in the kitchen stove, two hours long each, with a thirty minute break to cool to room temp in the middle. I'm not sure how this edge will hold up, but hopefully it'll do its job!
After these pictures were taken, I attached poplar wood scales using JB weld (I know, it's shoddy, but this is mostly an experimental knife. After sealing the handle, I'll polish the flat left side of the blade using wet-dry paper on float glass, and polish the convex bevel and edge using wet-dry paper on a mouse pad, followed by hand rubbing for the final finish on both sides at higher grits.
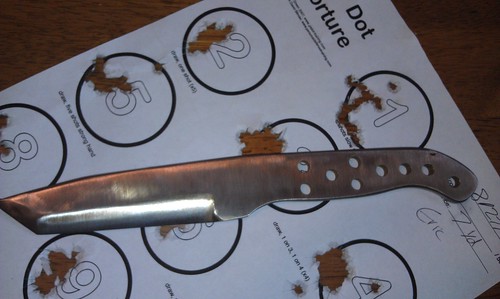
Jase's BADass Tanto has been in the works for far too long now. Jase requested a hard use outdoor adventure knife, capable of chopping and splitting wood for campfires, while still retaining a good edge for whittling, slicing rope, killing bears, and other regular camp tasks.
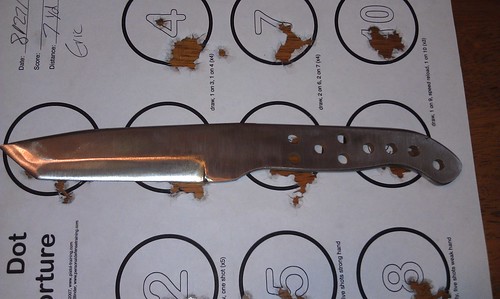
I picked D2 for the blade material, and ordered it from Texas Knifemaker's Supply. I wanted D2 for the corrosion resistance and because Texas Knifemaker's will heat treat for about 5 bucks before shipping. For a knife that Jase might be counting his life on, I'd rather make sure it's professionally done (way to be confident in my knifemaking skills, right?).
I chose a tanto point because I'm not sure that Jase doesn't completely suck at sharpening, and because Jase seems to like the aesthetics. The handle will be paracord wrapped for simplicity and for an extra supply of emergency rope. The blade has a simple V-grind, and the handle is drilled to be skeletonized using a rat-tail file to reduce weight and improve balance.
The handle is longer than required to fill the palm of the hand, but seems to be the right height and shape to have a positive grip when choking up on the blade for small cutting tasks, and the concave curve on the bottom inside of the grip fits perfectly against the middle finger when sliding down the grip for chopping. The final hole in the tang will be the anchoring point for a lanyard to aid in gripping while chopping.
One more similar view
Jase's knife will be getting just a touch more polish on higher grits, and then sent off for heat treat with Andy's Kickass Hunter:
The last of my knewest knives is for Andy, who will use it as a hunting knife. I took the profile from one of Andy's dad's favorite knives, and it's made from another piece of D2 ordered from Texas Knifemaker's. Like Jase's tanto, the final polish prior to heat treat will be done soon, before being sent off for heat treat.
Other than my Itty Bitty Whittler, this will be my first attempt at a convex zero edge. I'm really looking forward to seeing how it holds up!
No comments:
Post a Comment