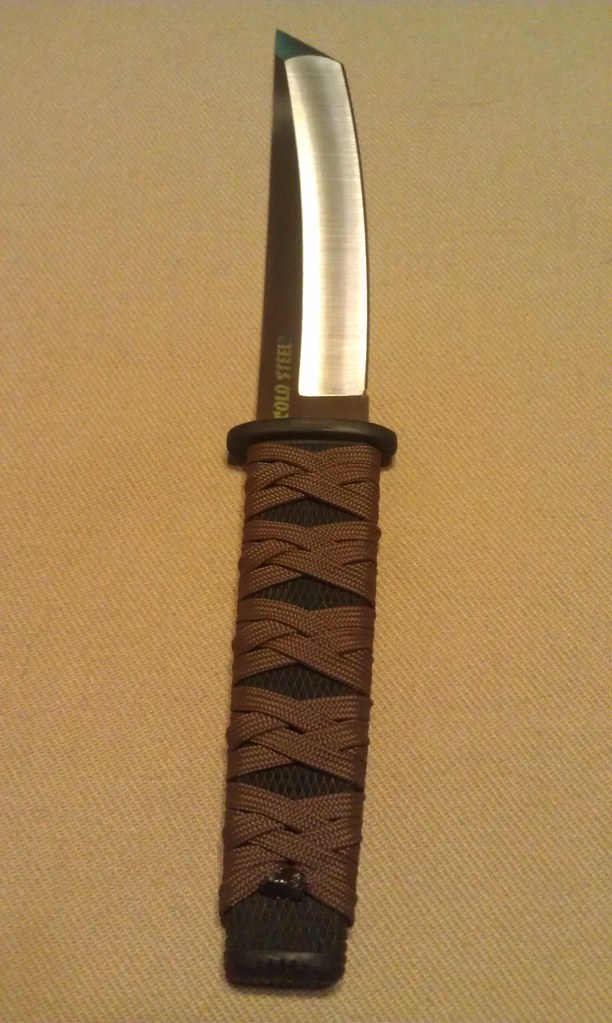
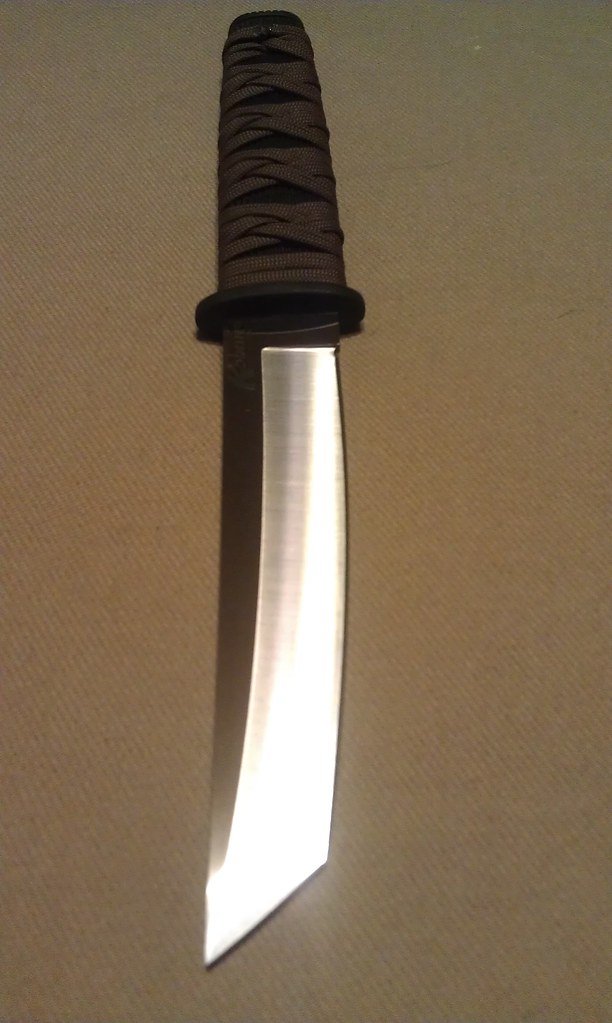
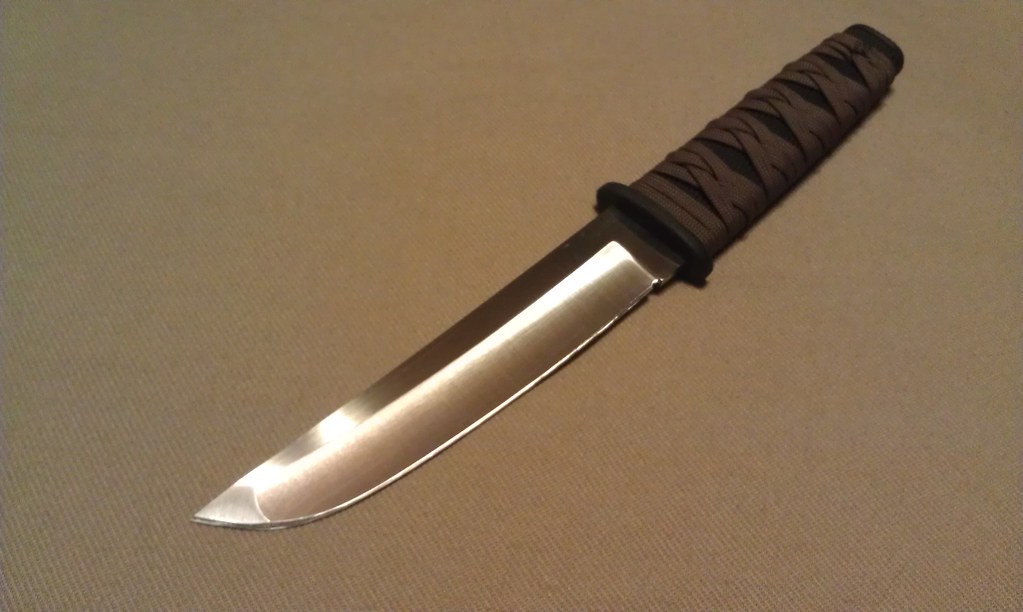
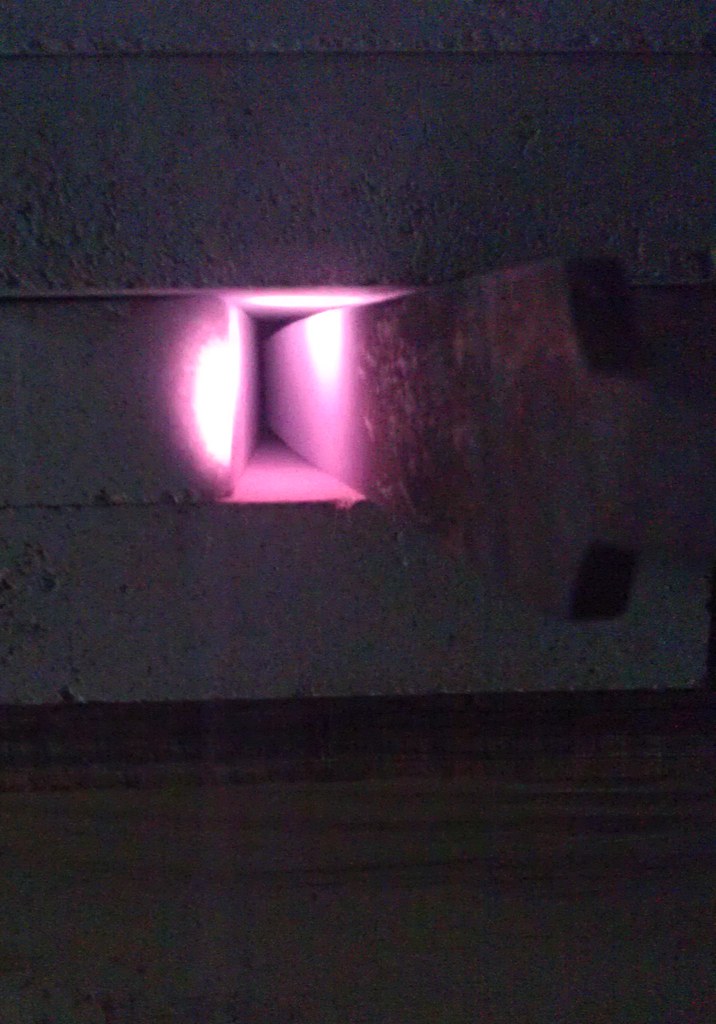
I've been looking for a fixed blade EDC and self defense knife for a while, especially after starting Pekiti-Tirsia Kali (that's another post). I've tried out a few different knives, but I was pretty surprised at how much I liked the Cold Steel Kobun after ordering it from Amazon, especially because I only paid 35 bucks for it with tax and free shipping. This is how it looks from the factory, measuring in at 0.1" below the legal limit for carry in Texas.
Anyways, being who I am, I couldn't just leave it alone, so I decided to make a few mods to the knife. First off, the knife is very slim, and that's one of the reasons I liked it for a carry knife, but I still felt like I'd prefer something a little... extra in the handle. The day that I got it in, the first thing I did was cord wrap the handle, to give it a little more thickness and improve my grip.
Here's how it looked after the wrap.
Right side:
Left side:
Right side:
I'd been thinking about how little I like the modern tanto shape with the very angular yokote on the kobun even before I purchased it. I saw a few other posts where people had reprofiled modern tantos, ending up with something approaching a Rick Hinderer type spanto type point. So with that inspiration I sat down with my whetstones and reprofiled the yokote. Here's what I ended up with, and I think I like the profile a LOT more than the factory grind.
Even being careful while wiping off the filings, I lightly marred the finish, so I'll have to go over it with some high grit wet/dry sandpaper eventually, but in the meantime, it'll do just fine.
I'm working on my first kiridashi. The blade material is an old file I purchased in a lot of 20 files on ebay.
I got a gift of firebricks from my friend a while back, and this is the first chance I've had to put them to use in my shop. Prior to now, I've been using a Mapp gas Benzomatic torch for annealing and heat treating, which is far from optimal. Using the firebricks, I put together a very simple forge (in the spirit of Wayne Goddard's one brick wonder). Basically, I placed one brick flat, then used the sides of two bricks to form a chamber about 1", maybe 1 1/4" wide. Then I laid another brick on top to hold them in place and form a roof, and set another brick down flat behind, with a last standing on its side to direct the hot gas flowing through out to the sides and up.
Just using the Benzomatic, it got hot FAST.
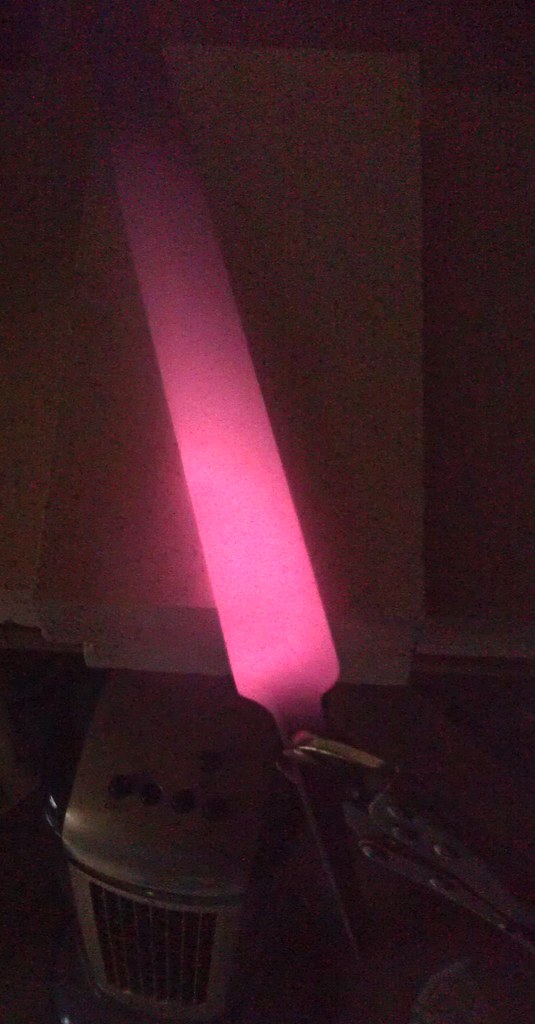
Here's how it looked during my heat soaks before annealing:
With torch on
Looking into the forge
The blade removed for photo-op
In that last, I removed the blade quickly and snapped a photo, and then put it back in the forge. I'm really happy to be able to get a relatively large area heated to critical with just a benzomatic. I've already purchased hoses and a burner for a more permanent setup, but haven't picked up a propane tank yet. I'll also note... it doesn't look that pink in person, it's much more of a bright orange, something must be off using my cell phone camera.
After annealing, I really got into the zone with cutting out and profiling the blade, drilling holes for the eventual cord wrap, and cutting out the inside of the handle, and I didn't even think to take pictures of the process. By the time I remembered, I was already in the heat soak for hardening (probably because I was reminded of taking the photos during the annealing process). Here's another photo of what it looked like:
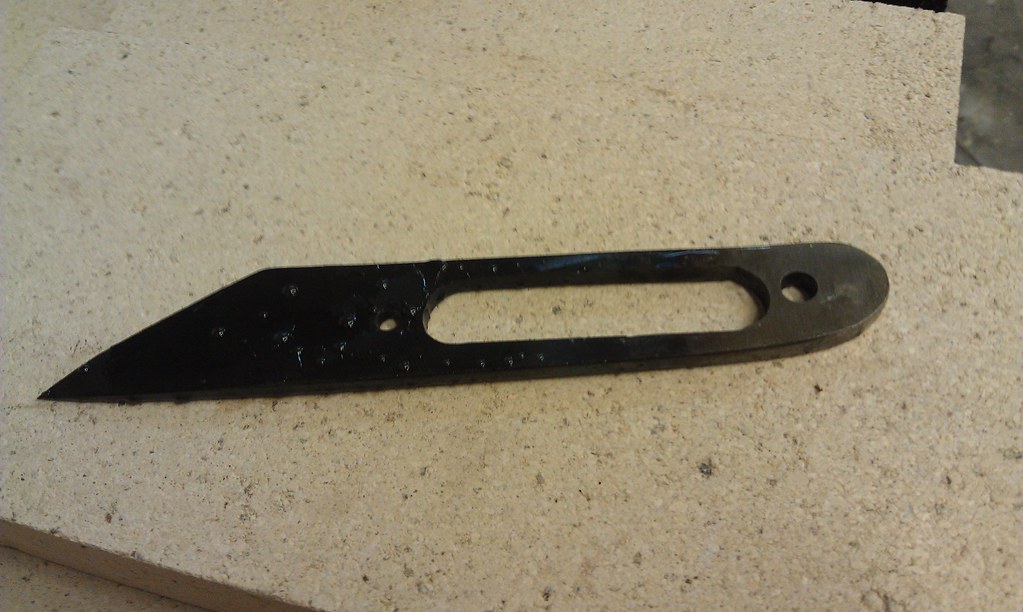
Right after quenching in oil, this is the blade profile
Sorry for neglecting to include anything for scale.
Ok, so here's how it looked after polishing on my bench stone and up to 220 grit. I left the majority of the blade at this low grit because I want it to have a "used" look. I think I might play around with giving it a nice patina with mustard or vinegar.
Here's the blade polished and sharpened. The secondary bevel was polished and sharpened to 2000 grit on wet or dry sandpaper on top of glass.
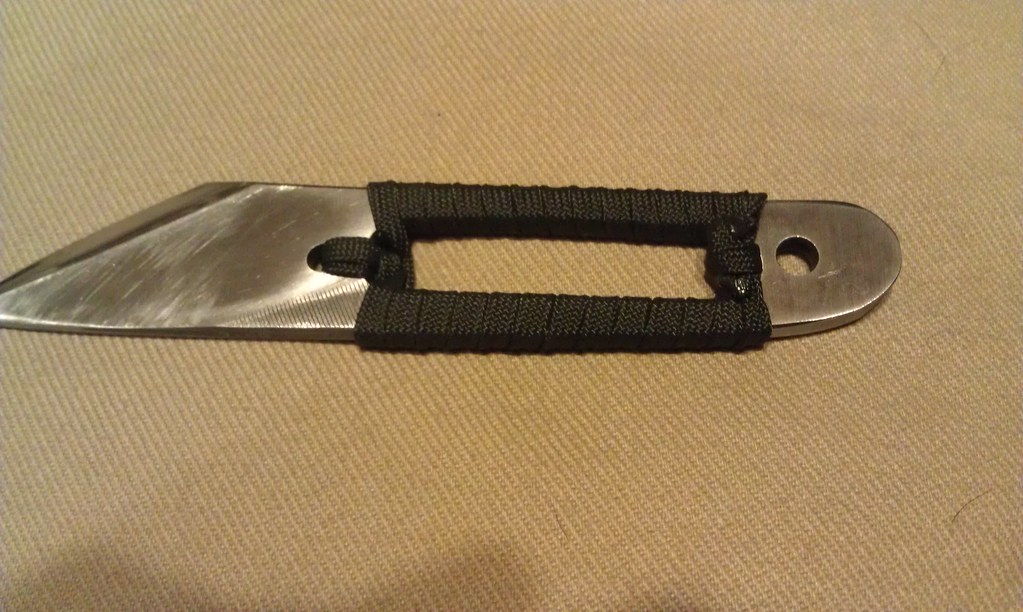
I cleaned the blade, and did a base wrap using black paracord sheath. You can see here, during polishing, I left the file marks on a small visible portion of the blade's flat, just as a reminder of its origins.
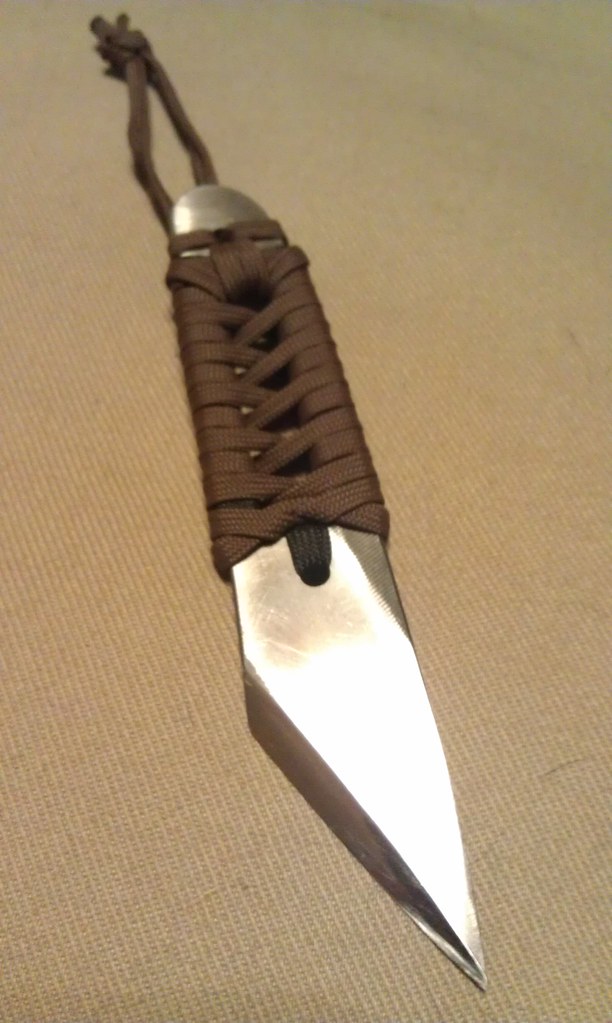
After the base wrap, I played around with more paracord sheath, and ended up with the following pattern.
I'm not sure how much I like it, I may pull it off and do the crossing cords on every wrap, or something else entirely.
I took these shots a couple nights ago on my phone, I've been meaning to post them since. This is another rusted dull 50c file I found in a pawn shop, that I hope I can breath some new life into and turn into a fixed blade carry knife for myself. Unfortunately, this little puppy didn't turn out so well, and I'm going to have to put it down...
Being a file, the process starts with annealing. This is simply heating the blade to orange (Which I'm not getting. I need a better heat treat setup) and allowing it to cool slowly. The slower it cools, the softer it will be. The best setup I've used for this is a good size fire with lots of coals, and simply letting the blade sit in the coals as they burn away to ash. Doing this, I've left a small fire to burn out, and come back the next day with the blade still too hot to touch under several layers of ash. The ash makes an excellent insulator.
Unfortunately, I don't have a place set up to do this kind of burn. I might just see about converting my small charcoal grill, or one bought in a pawn shop, and dedicate it for this purpose.
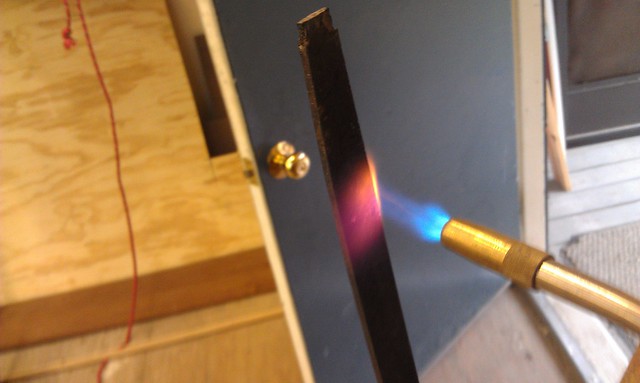
What I'm using here is a Mapp gas Benzomatic torch, and I'm simply getting a bright red heat, and walking it from one end of the file to the other slowly.
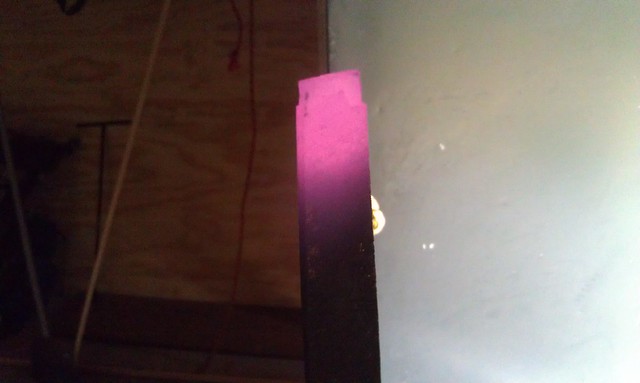
I needed to turn off the lights to get a good look at the color. This isn't even close to the actual color, for some reason, my phone camera turns this VERY pink.
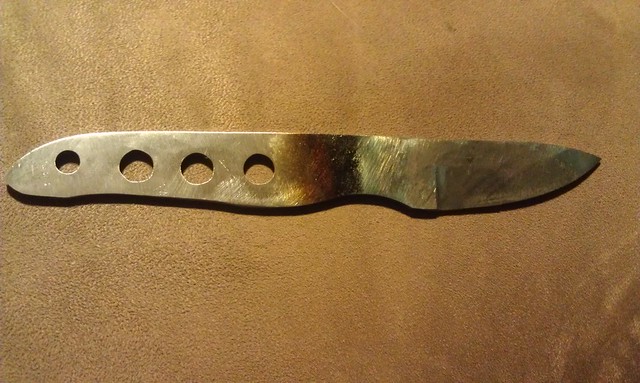
After annealing, I used a hacksaw to cut the blade to length. I used an awl to scratch my profile into the file (now a knife blank), and centerpunched holes before drilling the handle. Next, I used the disk on my belt sander, to rough out the profile, and the belt to grind in the concave curves of the handle and finger choil.
Not pictured here (my hands were filthy, and I didn't want to try and wash them to take a picture), after this point I used the disc sander and belt to grind the primary bevel, a basic V grind. I left a dime's thickness of material along the whole edge, and made sure that the grind was even on both sides, and proceeded to the heat treat step after I was satisfied with the grind lines.
I heat treated by eye (I don't have the equipment to give the blade a good soak, so I brought the blade section up to dull red heat and tried to keep it there for about 5 minutes using my torch. Then I quenched in canola oil (I need to get some used motor oil and a big bucket). After the quench, I checked to see if I'd adequately hardened using a little Nicholson file I picked up for a quarter during the same pawn shop runs. The file didn't bite in deep, but it sure didn't skip off the edge either. After a minute or two, I decided to try to bring the blade back up to heat, and see if it would quench well in water.
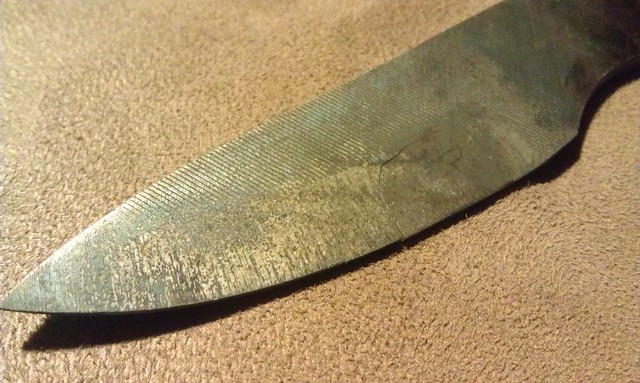
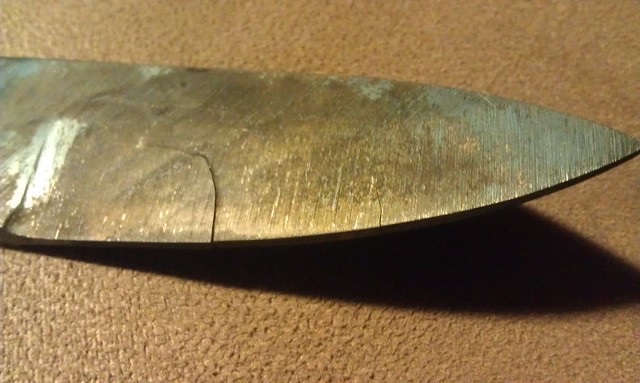
Big mistake... This closer view of the blade lets you see that I didn't grind off the file cuts on the flat, I thought they'd look nice. However, you should also notice that there's a pretty large crack running almost all the way from the edge to the blade flat.
Here you can see the cracks a little better. Looking at the blade edge on, I could see serious warping. From the side (I couldn't get a picture), you can see light through the bigger crack. A smaller crack, only visible on this side, is about two thirds of the way up the blade.
So, this little knife is on its way to the dumpster. Either that, or I'll hang it over my water bucket with a "DON'T QUENCH HERE" sign.
Either way, it's back to the pawn shop to look for good blade material. Maybe I can find some lawnmower blades or more old rusted over mill files. But, before I get started on my next project, I think it'll do me some good to also try to pick up or build a decent setup for heat treatments. And to find a magnet on a stick.
Tam has up a funny post, and I figured I'd jump in on the action.
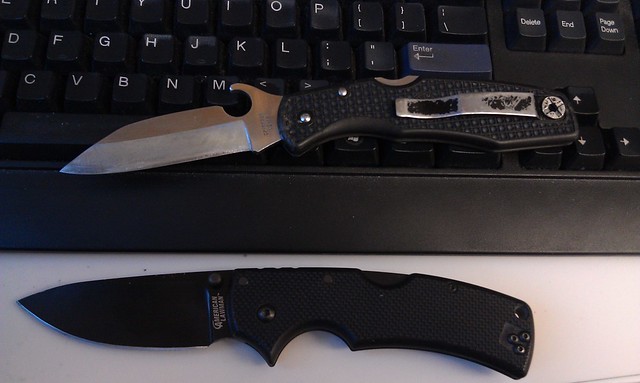
Top is my old, beat up Spyderco Endura (left pocket). Several years back, I snapped the tip off while whittling a hole through a piece of lumber. Spyderco changed the tip design on their Enduras in later models, because of just this problem.
After buying a new carry knife, I modified this one by reshaping the tip, grinding from the back of the blade with a wet wheel until I'd produced a wharncliffe-esque profile. While I was at it, I ground down through the thumb hole to make a makeshift Emerson wave opener. Normally, I'm carrying my new Endura wave in my left pocket, but I pulled it out to use it last week, and just slipped this one back in in its place. Surprisingly, this thumb hole opener works better than the production wave device as both a bottle opener AND as a rapid opening device. I'm still wary about the strength of the blade after decreasing the width, but I still use this knife all the time.
The bottom (right pocket) is my Cold Steel Lawman. Dad gave me this one over Christmas last year. It's very different from my usual every day carry knife, I usually don't like the thumb stud openers, but this one doesn't seem to give me much trouble. I've kept this knife mostly unused (and untested... I need to get another that I can test to destruction), but I've wanted to maintain the factory edge geometry and use this for my "flesh knife".
Well, there they are... what's in my pockets right now.
Made the trek to big-box store and got a scale. Took off the shoes, holstered LCR, and jumped on to see the bad news. I'm weighing in at 245. Wonderful.
In other news, I got the materials for my kilt. I'm going off the plans from instructables, so I picked up 4 yards of medium brown denim, some good looking snap closures, scissors, thread, etc... Hopefully, I still remember how to use a sewing machine, but the project might be on hold until I can find a pedal for the one I'm borrowing.
When I got home, I decided to put a quick edge on Itty bitty whittler. It wasn't shave sharp... the hairs jumped off my arm! Just to show myself I could... I shaved with it. Holy crap. Rusted out old file, to shave sharp with a couple hours work. Awesome!
Well, I'm trying to keep up a steady stream of posts... I might not make that goal, but here's to my continuing effort!
I figured that I'd put up a couple of pictures of my knewest knives in progress.
As a side note, I just picked up Wayne Goddard's 50$ Knife Shop, which I will highly recommend to any knife hobbyists. It has great sections on design, but more importantly, on how to make do with improvised and scavenged tools, to let you get working on knives when you have a limited budget (way to go grad school!).
Anyways, I have three projects in the works right now. Two are meant for friends, and are designed (I hope) to fit their needs well. The last is for me, and I'll have to see if it works out (I'm not sure I made the handle long enough).
Itty bitty whittler is for me. This little puppy started life as a rusted out Nicholson file bought for 50c at a pawn shop.
It really is pretty tiny. My pinky hangs off the bottom, but holding it up high with my thumb along the back of the blade, it seems to fit extremely snug into my hand.
I set the little guy down in my vise to take a quick picture.
Another view in the vise. Right now, my shop is fairly rudimentary. I've got a small clamp on vise, some C-clamps, my filing jig and files (Possibly a post to come?), belt/disc sander (4 x 36"), and electric drill. Luckily, I have several other tools back in New Mexico just waiting for me to pick them up, including a grinding wheel, 10" wet wheel, 4" bench vise, another belt sander, anvil, and coal/charcoal forge.
Anyway, this little knife is meant for one thing, and one thing only: whittling. I kept the blade short and straight with a wharncliffe (sheepsfoot) profile, which I prefer over a blade with any curvature along the edge. Also, I'll be attempting to keep this puppy sharp using a combination of the scary sharp method (wet/dry paper on float glass), and convex edge maintenance using wet-dry paper and a mousepad or mud flap rubber. the blade has a convex zero edge on the right, and is flat on the left, leaving an overall convex chisel grind. I'm experimenting to see how I like this grind on a carving knife.
These pictures were taken after the final passes on my belt sander before starting a hand rubbed finish. Hardening was done using a mapp gas benzomatic style torch to heat to dull red, using room temperature vegetable oil to quench in (I know... very descriptive). Putting the primitive uncontrolled harden aside, the blade didn't warp or crack, and my files skipped right over the edge with no bite.
I tempered at 400F for two cycles in the kitchen stove, two hours long each, with a thirty minute break to cool to room temp in the middle. I'm not sure how this edge will hold up, but hopefully it'll do its job!
After these pictures were taken, I attached poplar wood scales using JB weld (I know, it's shoddy, but this is mostly an experimental knife. After sealing the handle, I'll polish the flat left side of the blade using wet-dry paper on float glass, and polish the convex bevel and edge using wet-dry paper on a mouse pad, followed by hand rubbing for the final finish on both sides at higher grits.
Jase's BADass Tanto has been in the works for far too long now. Jase requested a hard use outdoor adventure knife, capable of chopping and splitting wood for campfires, while still retaining a good edge for whittling, slicing rope, killing bears, and other regular camp tasks.
I picked D2 for the blade material, and ordered it from Texas Knifemaker's Supply. I wanted D2 for the corrosion resistance and because Texas Knifemaker's will heat treat for about 5 bucks before shipping. For a knife that Jase might be counting his life on, I'd rather make sure it's professionally done (way to be confident in my knifemaking skills, right?).
I chose a tanto point because I'm not sure that Jase doesn't completely suck at sharpening, and because Jase seems to like the aesthetics. The handle will be paracord wrapped for simplicity and for an extra supply of emergency rope. The blade has a simple V-grind, and the handle is drilled to be skeletonized using a rat-tail file to reduce weight and improve balance.
The handle is longer than required to fill the palm of the hand, but seems to be the right height and shape to have a positive grip when choking up on the blade for small cutting tasks, and the concave curve on the bottom inside of the grip fits perfectly against the middle finger when sliding down the grip for chopping. The final hole in the tang will be the anchoring point for a lanyard to aid in gripping while chopping.
One more similar view
Jase's knife will be getting just a touch more polish on higher grits, and then sent off for heat treat with Andy's Kickass Hunter:
The last of my knewest knives is for Andy, who will use it as a hunting knife. I took the profile from one of Andy's dad's favorite knives, and it's made from another piece of D2 ordered from Texas Knifemaker's. Like Jase's tanto, the final polish prior to heat treat will be done soon, before being sent off for heat treat.
Other than my Itty Bitty Whittler, this will be my first attempt at a convex zero edge. I'm really looking forward to seeing how it holds up!